

How To Unlock Ampador Keep
- Run across also: Amdapor Keep (Hard)
![]()
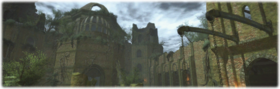
Amdapor Go on
"
One time, the lost civilization of Amdapor thrived in the Twelveswood, her citizens wielders of powerful, yet forbidden magicks which could be used to modify the very fabric of existence. Still, as is oft the case with peoples who fancy themselves gods, the self - assuring hubris of the Amdapori somewhen became their downfall, and equally quickly as they rose to power, did they disappear from the world. For generations, this relic of their once - mighty civilisation has remained hidden in plain sight - cloaked by the elementals who sought only to prevent newer generations from stumbling across the ancient Amdapori magicks. That is, until the Lambs of Dalamud - a dark cult who worship the now - fallen bottom moon as a god - dispelled the elementals' glamour by means unknown, and claimed the keep as their ain. Now the crazed followers use its ancient chambers to perform blood sacrifices in an attempt to resurrect their evil lord.
— In-game description
Amdapor Keep is a level fifty dungeon introduced in patch two.0.
Unlock
Level 50 players need to talk to Nedrick Ironheart in Vesper Bay, Western Thanalan (x12,y14), to showtime the quest ![]() Ghosts of Amdapor to unlock the dungeon.
Ghosts of Amdapor to unlock the dungeon.
The quest is available after the completion of the main scenario quest ![]() The Ultimate Weapon and The Aurum Vale dungeon.
The Ultimate Weapon and The Aurum Vale dungeon.
Objectives
- Articulate the Gier Hall: 0/1
- Clear the Bloody Transept: 0/1
- Defeat Anantaboga: 0/one
Bosses
 Psycheflayer
At first only the Lunatic Priest is available. Information technology has a circular AoE spell named Void Burn down Two that players should avert. At around half HP, he will summon the Psycheflayer. (Different the trash, this can't be stopped by killing him before he finishes Void Telephone call.) Burst downward the Lunatic Priest while the tank pulls the Psycheflayer to the far right side of the room, nigh the lantern.
Players should attempt to interrupt Void Burn 3 with stuns and avert Void Burn II past moving out of the footing indicator. Healers should remove the ![]() Affliction debuffs with
Affliction debuffs with ![]() Esuna if possible.
Esuna if possible.
Psycheflayer will spawn Rock Marionette and Marble Marionette throughout the fight. Be certain to kill them as soon as they spawn. Players should avert Stone Marionette's frontal column AoE ability and interrupt Marble Marionette'due south Obliterate spell.
At around half HP, Psycheflayer will summon the Megalith Marionette. (This tin can be stopped by killing him, if you're playing unsynced.) The giant golem will slowly walk around the boss room and cast ![]() Plaincracker, the giant circular AoE ability, occasionally. When you are positioned at the right side of the room, near the lantern, you tin can easily avert Plaincracker by hugging the right wall. Players should ignore Megalith Marionette and keep their focus on the Psycheflayer.
Plaincracker, the giant circular AoE ability, occasionally. When you are positioned at the right side of the room, near the lantern, you tin can easily avert Plaincracker by hugging the right wall. Players should ignore Megalith Marionette and keep their focus on the Psycheflayer.
Abilities
- Water is a spell that deals a minor amount of harm to a player.
- Void Thunder Three is a spell that deals a big amount of damage to a player.
- Canker is a spell that deals the debuff
 Affliction on a random player.
 - Listen Melt is an instant power that deals a moderate amount of harm to all players near Psycheflayer.
Adds
- Lunatic Priest is the add that summons Psycheflayer. Players should dodge his circular AoE spell named Void Fire II. At around half HP, He summons the Psycheflayer.
- Stone Marionette has a frontal column AoE ability named Rockslide. Information technology deals heavy damage to all players hit.
- Marble Marionette has a spell named Obliterate that deals a moderate amount of damage to all players nearby.
- Megalith Marionette has a very big circular AoE set on that centers around itself. The attack, named Plaincracker, deals massive corporeality of impairment to all players hit.
Demon Wall
Demon Wall will use his abilities in a blueprint. He will first utilize Liquefy (Center), followed by Liquefy (Sides). After ii rotations of these abilities, Demon Wall volition use Repel. Places should move to the edges of the platform when Demon Wall uses Liquefy (Centre), dark column in the center of the room. Players should motility to the center when Demon Wall uses Liquefy (Sides), dark columns in the left and right sides of the room. When the Demon Wall uses Repel, players should be in the center of the boss room to avoid being thrown off the platform.
- Liquefy (Eye) -> Liquefy (Sides) -> Liquefy (Middle) -> Liquefy (Sides) -> Repel
After Demon Wall uses 2nd Repel, a nighttime pool spawns in the dorsum of the platform. Avoid the nighttime pool if possible. He will besides summon 2 adds named Bloodlapper. Bloodlapper can paralyze players with AoE spells. Interrupt their casting of Thunderstorm and kill them equally soon as possible.
Abilities
- Murder Pigsty is an instant ability that deals a pocket-sized amount of damage to a random player.
- Repel is an power that knocks all players back and deals a moderate amount of impairment.
- Liquefy (Middle) is an ability that spawns a long black column in the centre of the boss room. It will practise a large amount of harm and inflict the debuff
 Heavy to all players hitting.
 - Liquefy (Sides) is an ability that spawns two long black columns at the sides of the boss room. It volition do a big amount of damage and inflict the debuff
 Slow to all players hit.
Adds
- Bloodlapper has an power named Thunderstorm. Thunderstorm is a circular AoE spell that inflicts the debuff
 Paralysis to all targets caught within. The spell should be interrupted with a stun because it is difficult to avert the ground indicator.
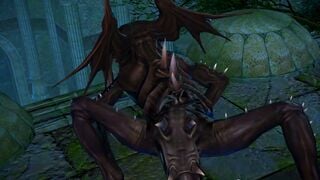
Anantaboga
Anantaboga is the concluding boss of Amdapor Go along. Non-tank players should exist Flanking the boss to avert its Rotten Breath (front end conal AOE) and Tail Drive (rear conal AOE). Rotten Breath will apply the debuff ![]() Affliction to all targets hit. Illness will reduce all healing done to the target. Healers should remove disease with
Affliction to all targets hit. Illness will reduce all healing done to the target. Healers should remove disease with ![]() Esuna if possible.
Esuna if possible.
Throughout the fight Anantaboga will use Imminent Catastrophe to spawn purplish, scarlet orbs in the center of the boss room. The orbs will do harm to all players in its line of sight. Exist sure to hide backside the statues effectually the room to avert the harm. Additionally, the ability volition awake i of the statues. Avoid the statue'south circular AoE attack and burst information technology down.
After in the fight Anantaboga volition use Plague Dance on random players. Players with the debuff should motility away from statues and other players so the scarlet orbs will not damage any other players. The scarlet orbs disappear when Anantaboga uses Imminent Catastrophe.
Abilities
- Look is an instant attack that deals a minor corporeality of damage to the target with the most enmity.
- Tail Drive is a rear cone AoE attack that deals high amount of damage and inflicts a DoT named Concussion to all players hit. Anantaboga will only employ this ability when one or more players are behind it.
- Rotten Breath is a frontal AoE attack which deals heavy damage and inflicts the debuff Disease to all players hit.
- Imminent Catastrophe is a giant purplish, cherry-red orb that appears in the heart of the room. It deals heavy damage to all players in the line of sight.
- Plague Dance is a purple beam that targets a random thespian. afterwards a few seconds, a small-scale red orb appears at the location and deals damage to all players nearby.
Adds
- Night Helot has an ability named Terror Eye that places a circular AoE under a random thespian. It deals heavy damage to all players caught inside.
Loot
 Psycheflayer
- iv
Allagan Tomestone of Poetics
| Proper name | Type | Rarity | Quantity |
|---|---|---|---|
| | Hands | B Dungeon | 1 |
| | Caput | B Dungeon | one |
| | Hands | B Dungeon | ane |
| | Head | B Dungeon | 1 |
| | Caput | B Dungeon | 1 |
| | Head | B Dungeon | 1 |
| | Hands | B Dungeon | 1 |
Demon Wall
- half-dozen
Allagan Tomestone of Poetics
| Name | Blazon | Rarity | Quantity |
|---|---|---|---|
| | Body | B Dungeon | one |
| | Body | B Dungeon | 1 |
| | Legs | B Dungeon | ane |
| | Legs | B Dungeon | 1 |
| | Body | B Dungeon | ane |
| | Torso | B Dungeon | ane |
| | Legs | B Dungeon | 1 |
| | Body | B Dungeon | 1 |
| | Legs | B Dungeon | ane |
 Anantaboga
- 10
Allagan Tomestone of Poetics -
 Demon Wall Card
| Proper noun | Type | Rarity | Quantity |
|---|---|---|---|
| | Firearms | B Dungeon | 1 |
| | Fist Weapon | B Dungeon | 1 |
| | Daggers | B Dungeon | 1 |
| | Greataxe | B Dungeon | ane |
| | Bow | B Dungeon | 1 |
| | Greatsword | B Dungeon | 1 |
| | Book | B Dungeon | 1 |
| | Polearm | B Dungeon | 1 |
| | Shield | B Dungeon | 1 |
| | Pikestaff | B Dungeon | 1 |
| | Sword | B Dungeon | 1 |
| | Star World | B Dungeon | 1 |
| | Shield | B Dungeon | 1 |
| | Staff | B Dungeon | i |
| | Feet | B Dungeon | i |
| | Feet | B Dungeon | ane |
| | Feet | B Dungeon | 1 |
| | Feet | B Dungeon | 1 |
Other Boodle
 Treasure Coffer 1 (X: 9.6 Y: 10.i)
| Proper name | Type | Rarity | Quantity |
|---|---|---|---|
| | Feet | B Dungeon | 1 |
| | Anxiety | B Dungeon | i |
| | Feet | B Dungeon | one |
| | Feet | B Dungeon | 1 |
| | Minion | A Basic | 1 |
Treasure Coffer 2 (X: 10.five Y: ten.v)
| Proper name | Type | Rarity | Quantity |
|---|---|---|---|
| | Head | B Dungeon | i |
| | Head | B Dungeon | one |
| | Head | B Dungeon | 1 |
| | Head | B Dungeon | i |
| | Hands | B Dungeon | i |
| | Hands | B Dungeon | one |
| | Hands | B Dungeon | one |
Treasure Countinghouse three (X: 15.ii Y: 13.1)
| Name | Type | Rarity | Quantity |
|---|---|---|---|
| | Body | B Dungeon | 1 |
| | Body | B Dungeon | ane |
| | Torso | B Dungeon | 1 |
| | Body | B Dungeon | 1 |
| | Body | B Dungeon | 1 |
| | Legs | B Dungeon | 1 |
| | Legs | B Dungeon | 1 |
| | Legs | B Dungeon | 1 |
| | Legs | B Dungeon | one |
Treasure Coffer 4 (X: 17.1 Y: xi.i)
| Name | Type | Rarity | Quantity |
|---|---|---|---|
| | Sword | B Dungeon | 1 |
| | Greataxe | B Dungeon | 1 |
| | Greatsword | B Dungeon | 1 |
| | Polearm | B Dungeon | ane |
| | Fist Weapon | B Dungeon | 1 |
| | Daggers | B Dungeon | 1 |
| | Bow | B Dungeon | 1 |
| | Firearms | B Dungeon | 1 |
| | Staff | B Dungeon | 1 |
| | Book | B Dungeon | one |
| | Cane | B Dungeon | 1 |
| | Star Earth | B Dungeon | i |
| | Shield | B Dungeon | i |
| | Shield | B Dungeon | 1 |
| | Crafting material | A Basic | 1 |
Images

How To Unlock Ampador Keep,
Source: https://ffxiv.consolegameswiki.com/wiki/Amdapor_Keep
Posted by: parrgivernevends.blogspot.com
0 Response to "How To Unlock Ampador Keep"
Post a Comment